Power Apps Tips: Visually Distinguishing Your App’s Environment


Are you tired of the confusion and mix-ups that come with managing Power Apps across multiple environments? We have all been there – one minute we are confidently testing a new feature, and the next, we are lost in a world of confusion until we realize we are in the production environment, not our development or testing environment. It can be both surprising, confusing, and disorienting.

But what if there was a way to make our apps and more importantly our users more environmentally aware. Imagine an app that clearly shows whether it is in development, testing, or production. This isn’t just a dream; it is entirely possible, and we are going to explore how. With a combination of environment variables, labels, and color properties, we can transform our apps and adjust their appearance all based on the environment they are in.

In this guide we will go from apps that are indistinguishable between environments.

To apps that are informative and allow us to develop, test, and use our apps with confidence.

Dive in and explore as we start with the basics of environment variables and then move to advanced techniques for dynamic configuration. By the end of the guide, we will not only learn how to do this, but it will become clear as to why this is helpful when managing Power Apps across different environments.

Here is what this guide will cover:

  1. Understanding Power Apps Environments and Environment Variables
    1. Introduction to Power Apps Environments
    2. The Role of Different Environments
    3. The Importance of Power Apps ALM
  2. The Significance of Environmental Awareness in Power Apps
    1. Common Challenges in Multi-Environment Scenarios
    2. Importance of Identifying the Current Environment
  3. Building The App
    1. Setting the Stage
    2. Creating the App in the Development Environment
    3. Extracting Environment Information
      1. Building the Power Automate Workflow
    4. Call the Workflow and Store the Outputs
  4. Adding the Environmental Visual Cues
    1. Adding Text Labels
    2. Environmental Specific Color Themes
    3. Deploying to Different Environments
  5. Wrapping Up: Ensuring Clarity and Efficiency in Your Power Apps

Understanding Power Apps Environments and Environment Variables

Power Apps is a fantastic and powerful platform that allows us to create custom business applications with ease. However, as our projects and solutions grow, we begin to dive into the realm of application development, and we encounter the need for efficient management. This is precisely where Power Apps environments step in to save the day.

Introduction to Power Apps Environments

Environments act as unique containers helping facilitate and guide us through the entire app development journey. Each environment is a self-contained unit, ensuring that our data, apps, and workflow are neatly compartmentalized and organized. This structure is particularly beneficial when managing multiple projects or collaborating with a team. Environments are like distinct workspaces, each tailored for specific stages of your app development journey.

These environments let use build, test, and deploy our applications with precision and control, ensuring that chaos never gets in the way of our creativity while crafting our Power Apps applications.

The Role of Different Environments

Let’s shed some light on the roles played by different environments. Environments can be used to target different audiences or for different purposes such as development, testing, and production. Here we will focus on staged environments (dev/test/prod) an environment strategy that helps ensure that changes during development do not break the app users’ access in our production environment.

First up is the development environment – the birthplace of our app ideas. It is where we sketch out our vision, experiment with various features and lay the foundation for our apps.

Next is the testing or QA environment which takes on the role of the quality assurance center. In this environment we examine our app, validate its functionality and user experience, and ensure everything works seamlessly and as expected before it reaches our final end users.

Lastly, we have our production environment, where our apps go live. It is the real-world stage where our apps become accessible to its intended users, interacts with live data, and requires stability and reliability.

The Importance of Power Apps ALM

We cannot get too far into exploring Power Apps environments, and environment strategies without mentioning Application Lifecycle Management (ALM). ALM is a pivotal aspect of successful software development, and our Power Apps are no exception. ALM within Power Apps helps ensure a smooth transition between the development, testing, and production phases of our projects. It encompasses maintaining version control, preventing disruptions, and streamlining the deployment process.

If you are curious to learn more about Power Apps ALM, I encourage you to visit the post below that discusses its different aspects including how to implement ALM, where Power Apps solutions fit into the picture, version control, change management, and much more.

Explore how ALM can enhance collaboration, improve performance, and streamline development in Power Platform solution. 


The Significance of Environmental Awareness in Power Apps

Common Challenges in Multi-Environment Scenarios

Navigating through multiple environments in Power Apps can sometimes feel like a tightrope walk. One common challenge is keeping track of which environment we are working in and what environment app we are accessing in our browser. It can be easy to lose track especially when we are deep in development and testing.

Image a scenario where we created a new feature in development, and as the developer we wish to verify this change before deploying the update to our testing environment. But as often happens, something comes up and we cannot check the functionality right away. When we come back later, we launch the app using the web link url, and we don’t see our expected update. Was it an issue how we developed the change, are we viewing the development app, are we viewing the testing app? All can lead us to more questions and confusion, that could be solved if our app clearly indicates the environment it resides in no matter how we access the ap.

Importance of Identifying the Current Environment

Informing us and other app users, especially those that may use the app across different environments, about the current environment is focused on providing control and safety. Being aware of our environment ensures that we are in the correct environment to carry out our tasks.

Identifying the environment is crucial for effective testing of our apps. By knowing we are in the right testing environment, we can experiment and troubleshoot without the fear of affecting the live application or data.

Moreover, it aids in communication within our teams. When everyone is on the same page about the environment they should be working in for specific tasks, collaboration becomes smoother, and we can minimize the chances of errors. The goal is to create a shared understanding and a common approach among team members.


Building The App

Setting the Stage

For our app we will be using a SharePoint List as the data source. Each environment will use its own specific list, so we have 3 different lists that are on different SharePoint sites. Once the lists are created, we can begin building our solution and app.

The first step to creating our Power App that we can easily move between environments is creating a solution to contain our app. In addition to the canvas app the solution will also contain the various other components we require, including a Power Automate workflow and environment variables.

To do this we navigate to our development environment and then select Solutions in the left-hand menu. On the top menu select New solution and provide the solution a name and specify the publisher. For additional details visit this article.

Learn how to create a solution in Power Apps

After creating our solution, we will first create our environment variables that will define the app’s data source. Since the SharePoint site and list will be changing as we progress our app from development to test to production, we will create two environment variables. The first to specify the SharePoint Site, and the second to specify the SharePoint List on the site. For details on environment variables and how they can be modified when importing a solution to another environment visit this article.

Use environment variables to migrate application configuration data in solutions

Here we will manually create the environment variables, so we have control over naming, but there is also the option to automatically create the environment variables from within our app. In the canvas app editor on the top menu select Settings. Within the General section locate the Automatically create environment variables when adding data sources, and toggle to the desired value.

To manually add environment variables to our solution, select New on the top menu, under more we will find Environment variables. Provide the environment variable a name and under Data Type select Data source. In the connector drop down select SharePoint and a valid SharePoint connection in the Connection drop down. For the first variable under Parameter Type select Site and then New site value and select the required SharePoint site or provide the site url. For the second environment variable select List for the Parameter Type, then for the Site select the newly created environment variable, and then New list value, and select the required SharePoint List.

Creating the App in the Development Environment

Our app starts to come to life in our development environment. First, we focus on creating the app’s core features and functionalities. This is where our creativity and technical skills come into play. We can experiment with different designs, workflows, and integrations, all within the safe confines of the development environment. Its a bit like being in a laboratory, where we can test hypotheses and make discoveries without worrying about breaking the version of the app our end user might be actively using.

First, we will connect to our data source using our environment variables. In the left side menu select the data menu, then add new data, and search for SharePoint. After selecting the SharePoint data source and connection, in the Connect to a SharePoint site pane select the Advanced tab and select the environment variable we created previously, and then do the same to select the list environment variable.

If we opted to not create the environment variables first, and ensured the automatically create environment variables when adding data source setting is turned on, we can provide a site URL and select a list. We will then be prompted that an environment variable will be automatically generated to store information about this data source.

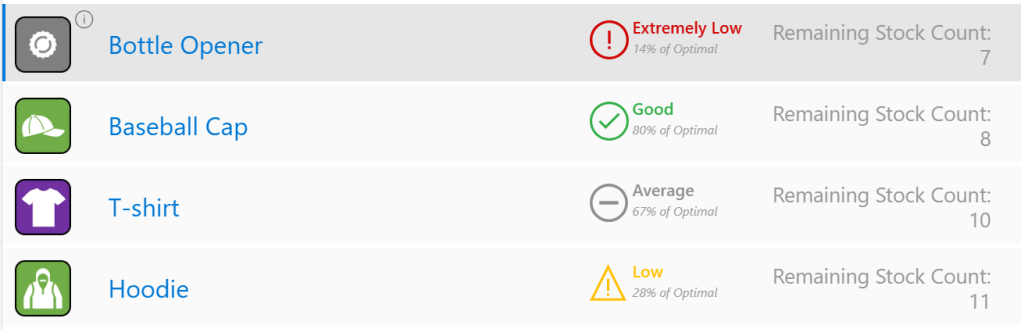
Once connected to our data source we will build out the basic functionality of our app. For this simplified app this includes a vertical navigation component and a gallery element to display the list items. Here is the base app that will be our launching point to build a more informative and dynamic app.

Extracting Environment Information

As we deploy our app to different environments, we will update the SharePoint site and list environment variables. Since the values of these environment variables will be distinct and specific to the environment, we can leverage this to help determine and show what environment the app is in.

Now, if we search the data sources that we can add to our app for “environment”, we will find an environment variable values dataverse source. The data source can be used to extract the values of our environment variables however, this will give our app a Premium licenses designation. Premium licensing may not always be suitable or available, so we will explore an alternative method, using a Power Automate workflow and our App.OnStart property.

Building the Power Automate Workflow

In the left side menu, select the Power Automate menu option, then create new workflow.

To extract and return the information we need to our app we will create a simple flow, consisting only of the trigger and the Respond to a PowerApp or flow action. Selecting the Create new flow button will create a Power Automate workflow with a PowerApps (V2) trigger. For this workflow we will not need to add any inputs to this trigger action.

In the workflow designer, select New action and search for Respond to a PowerApp or flow, and add the action to the workflow. Here we will add two outputs, the first to return the value of the SharePoint site environment variable and the second to return the value of the SharePoint list environment variable. Depending on our requirements, we may only need one of these values to determine the appropriate environment information. For the output value we can find our environment variables listed in the dynamic content.

The final workflow is shown below. Once created give the workflow an informative name, then save and close the workflow.

Call the Workflow and Store the Outputs

On the start of our app, we will run our workflow and store the output values, which are the values of our environment variables, in a global variable within our app scope. We do this by using the App.OnStart property and setting a variable to store the outputs. We will add the following to the App.OnStart property.

Set(gblEnvironmentDetails, .Run())

Here, we create the gblEnvironmentDetails global variable which will store the outputs of our workflow. This variable has a record data type with values for both our sourcesiteurl and sourcelistid outputs.

The App.OnStart event, becomes crucial as it sets the stage for the entire app session. Now, each time our app starts are workflow will return the environment values we require ensuring this information is always available from the moment our app is launched.

We can visual these values, and how they change between our environments by adding labels to our app. We will add various environment detail labels. The first we will add will display out SharePoint site environment variable value, set the text property of the label to the following.

"SharePoint Site Environment Variable: " & gblEnvironmentDetails.sourcesiteurl

We will make this value a bit easier to work with and evaluate, by extracting the site name from the site url. We add another label to display the site name, and set the text property of the label to the following.

"SharePoint Site : " & Last(Split(gblEnvironmentDetails.sourcesiteurl, "/sites/")).Value

This expression splits the site url by the text “/sites/” and then returns all the text that follows it which is the site name.

Lastly, we add a text label to display the value stored in our SharePoint List environment variable by adding a new label and setting the text property to the following.

"SharePoint List Id : " & gblEnvironmentDetails.sourcelistid

Adding the Environmental Visual Cues

To make the environment distinction clear we will add environment-specific colors and text labels in our app’s design.

Adding Text Labels

We will start by adding an environment label in the header, that will be placed opposite of our app name. To do this we first create a named formula and then use this to set the text property of the new label in our header element. In the App.Formulas property add the following.

nfmEnvironment = Switch(
    Last(Split(gblEnvironmentDetails.sourcesiteurl, "/sites/")).Value,
    "PowerAppsDevSource", "DEV",
    "PowerAppsTestSource", "TEST",
    "SalesandMarketing", "PROD",
    "UNKNOWN"
);

This expression creates a new named formula nfmEnvironment and we use the switch function to evaluate the site name of our SharePoint site environment variable using the same formula we used above and return our environment label. For our app if our SharePoint site environment variable is for the Power Apps Dev Source site the named formula nfmEnvironment will return a value of DEV, when set to Power Apps Test Source it will return TEST and when set to our Sales and Marketing site it will return PROD. The formula also includes a default value of UNKNKOWN, if none of the above conditions are true, this will help identify a potential error or our app data source set to an unexpected site.

We then add a new label to our header element and set the text property to nfmEnvironment. Additionally, the navigational component used in our app has a text input to display the environment label near the bottom under the user profile image. We will set the input value also to nfmEnvironment.

Environmental Specific Color Themes

Next, we will elevate our awareness when working with our apps across different environments by moving beyond just labels. We will now leverage different visual cues and color themes between the different environments. In our development environment the navigation component and header will be green, when in our testing environment these elements will be gray, and finally in production they will be blue.

The first step to include this functionality is to define our color theme that we can then use to set the color of our different elements depending on the value of nfmEnvironment. To create our color theme, we will create a new named formula. In the App.Formulas property we will add the following to create a named formula containing the basics of a color theme used within our app.

nfmThemeColor =
{
    primary: "#004F6B",
    onPrimary: "#FFFFFF",
    primaryFixed: "#9DC8EB",
    onPrimaryFixed: "#004D67",
    secondary: "#005C3F",
    onSecondary: "#FFFFFF",
    secondaryFixed: "#78CDA7",
    onSecondaryFixed: "#005138",
    tertiary: "#394C57",
    onTertiary: "#FFFFFF",
    tertiaryFixed: "#D0DDE4",
    onTertiaryFixed: "#364954",
    background: "#F6FAFE",
    onBackground: "#171C1F",
    surface: "#F6FAFE",
    onSurface: "#171C1F",
    surfaceContainerLowest: "#FFFFFF",
    surfaceContainerLow: "#F0F4F8",
    surfaceContainer: "#EAEEF2",
    surfaceContainerHigh: "#E5E9ED",
    surfaceContainerHighest: "#DFE3E7"
};

This named formula now stores our different color values and we can use it and our nfmEnvironment formula to dynamically color our apps elements.

We will start with setting the fill of the header. The header is a responsive horizontal container containing our two text labels. The fill property of the container we will set to the following expression.

Switch(
    nfmEnvironment,
    "DEV", ColorValue(nfmThemeColor.secondary),
    "TEST", ColorValue(nfmThemeColor.tertiary),
    "PROD", ColorValue(nfmThemeColor.primary),
    Color.Black
)

Adding the color cues will following a similar pattern that we used to set the environment label text property. We use the Switch function to evaluate our nfmEnvironment value and depending on the value set the color to the secondary color (green), tertiary color (gray), primary color (blue), or if a condition is not met the header will be set to black.

We then use the same expression for the vertical selection indicator bar and next arrow icon in our app’s gallery element. Next we incorporate the same expression pattern to color the different aspects of the navigation element using the expressions below.

//Navigation Background
Switch(
    nfmEnvironment,
    "DEV", ColorValue(nfmThemeColor.secondaryFixed),
    "TEST", ColorValue(nfmThemeColor.tertiaryFixed),
    "PROD", ColorValue(nfmThemeColor.primaryFixed),
    Color.Black
)

//Selected Item Background
Switch(
    nfmEnvironment,
    "DEV", ColorValue(nfmThemeColor.onSecondaryFixed),
    "TEST", ColorValue(nfmThemeColor.onPrimaryFixed),
    "PROD", ColorValue(nfmThemeColor.onTertiaryFixed),
    Color.Black
)

//Base Icon Color
Switch(
    nfmEnvironment,
    "DEV", ColorValue(nfmThemeColor.onSecondaryFixed),
    "TEST", ColorValue(nfmThemeColor.onPrimaryFixed),
    "PROD", ColorValue(nfmThemeColor.onTertiaryFixed),
    Color.Black
)

After adding the dynamic color themes to our navigation our environment aware app is complete.

We now have a clear and informative app that instantly informs users about the app’s current environment. Using text labels and visual cues are simple yet effective ways to avoid confusion and ensure that everyone knows which version of the app they are interacting with.

Deploying to Different Environments

Now that our app is complete, we save and publish our version of the app and begin the process of deploying the app to the testing environment. First, we will edit each environment variables within out solution and remove the current site and current list from our solution. This will help ensure the values we set for these variables in our development environment don’t carry with our solution when we import it to different environments.

Then export the solution and download the exported .zip file. Next, we switch to our test environment, and import the solution. During the import process we are prompted to set our two environment variables, which help set our dynamic and environment specific visual cues in our app. We set the values and finish importing the app to our test environment to view our app in the test environment.

We can then also repeat the process, to see our app in the production environment.

Wrapping Up: Ensuring Clarity and Efficiency in Your Power Apps

As we wrap up our exploration of visually distinguishing environments in Power Apps, remember that the key to a successful app lies in its clarity and user-friendliness. By implement the techniques we have discussed, from color-coding elements of our app and labeling to using dynamic UI elements, we can significantly enhance the user experience. These strategies not only prevent confusion but also streamline our workflow across development, testing, and production environments. When we embrace these tips, we can make our Power Apps intuitive and efficient, ensuring that users always know exactly where they are and what they are working with.


Thank you for reading! Stay curious, and until next time, happy learning.

And, remember, as Albert Einstein once said, “Anyone who has never made a mistake has never tried anything new.” So, don’t be afraid of making mistakes, practice makes perfect. Continuously experiment, explore, and challenge yourself with real-world scenarios.

If this sparked your curiosity, keep that spark alive and check back frequently. Better yet, be sure not to miss a post by subscribing! With each new post comes an opportunity to learn something new.

Dive Into DAX: Data Aggregation Made Easy


Welcome to another insightful journey of data analysis with Power BI. This guide is crafted to assist you in enhancing your skills no matter where you are in your DAX and Power BI journey through practical DAX function examples.

As you explore this content, you will discover valuable insights into effective Power BI reporting and develop strategies that optimize your data analysis processes. So, prepare to dive into the realm of DAX Aggregation functions.

  1. Unraveling the Mystery of Aggregation in DAX
  2. SUMming It Up: The Power of Basic Aggregations
    1. SUM
  3. Understanding DAX Iterators: The X Factor in Aggregations
  4. AVERAGEx Marks the Spot: Advanced Insights with Average Functions
    1. AVERAGEX
  5. COUNTing on Data: The Role of Count Functions in DAX
    1. COUNT
    2. COUNTA
    3. COUNTROWS
    4. DISTINCTCOUNT
  6. MAXimum Impact: Extracting Peak Value with MAX and MAXX
    1. MAX
    2. MAXX
  7. MINing for Gold: Uncovering Minimum Values with DAX
    1. MIN
    2. MINX
  8. Blending Aggregates and Filters: The Power Duo
  9. Navigating Pitfalls: Common Mistakes and How to Avoid Them
  10. Mastering Aggregation for Impactful Analysis

Unraveling the Mystery of Aggregation in DAX

Aggregation functions in DAX are essential tools for data analysis. They allow us to summarize and interpret large amounts of data efficiently. Let’s start by first defining what we mean when we talk about aggregation.

Aggregation is the process of combining multiple values to yield a single summarizing result. In the realms of data analysis, this typically involves calculating sums, averages, counts, and more to extract meaningful patterns and trends from our data.

Why is aggregation so important? The goal of our analysis and repots is to facilitate data-driven decision-making and quick and accurate data summarization is key. Whether we are analyzing sales data, customer behavior, or employee productivity, aggregation functions in DAX provide us a streamlined path to the insights we require. These functions enable us to distil complex datasets into actionable information, enhancing the effectiveness of our analysis.

As we explore various aggregation functions in DAX throughout this post, we will discover how to leverage these tools to transform data into knowledge. Get ready to dive deep into each function to first understand it and then explore practical examples and applications.

For those of you eager to start experimenting there is a Power BI report-preloaded with the same data used in this post ready for you. So don’t just read, follow along and get hands-on with DAX in Power BI. Get a copy of the sample data file here:

This dynamic repository is the perfect place to enhance your learning journey.


SUMming It Up: The Power of Basic Aggregations

SUM

When it comes to aggregation functions, SUM is the foundational member. It is straightforward and common but don’t underestimate its power. The SUM function syntax is simple as well.

SUM(column)

The argument column is the column of values that we want to sum.

Let’s put this function to work with our sample dataset. Suppose we need to know the total sales amount. We can use the SUM function and the Amount column within our Sales Table to create a new TotalSales measure.

TotalSales = 
SUM(Sales[Amount])

This measure quickly calculates the total sales across the entire dataset.

However, the utility of SUM goes beyond just tallying totals. It can be instrumental in uncovering deeper insights within our data. For a more advanced application, let’s analyze the total sales for a specific product category in a specific sales region. We can do this by combining SUM with the CALCULATE function, here is how the measure would look.

US Smartphone Sales = 
CALCULATE (
   [TotalSales],
   Products[Product] = "Smartphone",
   Regions[Region] = "United States"
)

The measure sums up sales amounts exclusively for smartphones in the United Sales. For additional and more complex practical applications of SUM, for example calculating cumulative sales over time, continue your exploration with the examples in the following posts.

Demystifying CALCULATE: An exploration of advanced data manipulation. 

Discover how to effortlessly navigate through intricate data landscapes using DAX Filter Functions in Power BI.

The beauty and power of SUM lies in its simplicity and versatility. It is a starting point for deeper analysis, and commonly serves as a steppingstone towards more complex functions and insights. As we get more comfortable with SUM we will soon find it to be an indispensable part of our analytical approach in Power BI.


Understanding DAX Iterators: The X Factor in Aggregations

Before we continue diving deeper, if we review the aggregation function reference, we will notice several aggregation functions ending with X.

Learn more about: Aggregation Functions

These are examples of iterator functions in DAX and include functions such as SUMX, AVERAGEX, MAXX, MINX, and COUNTX. Understanding the distinction between these functions and their non-iterative counterparts like SUM is crucial for advanced data analysis.

Iterator functions are designed to perform row-by-row computations over a table (i.e. iterate over the table). In contrast to standard aggregations that operate on a column, iterators apply a specific calculation to each row, making them more flexible and powerful in certain scenarios.

In other words, SUM will provide us the total of a column while SUMX provides the total of an expression evaluated for each row. This distinction is key in scenarios where each row’s data needs individual consideration before aggregating to a final result.

For more in-depth insights into the powerful capabilities of DAX iterator functions, explore this in-depth post.

Iterator Functions — What they are and What they do


AVERAGEx Marks the Spot: Advanced Insights with Average Functions

AVERAGEX

Let’s explore an aggregation iterator function with AVERAGEX. This function is a step up from our basic average. As mentioned above, since it is an iterator function it calculates an expression for each row in a table and then calculates the average (arithmetic mean) of these results. The syntax for AVERAGEX is as follows:

AVERAGEX(table, expression)  

Here, table is the table or an expression that specifies the table over which the aggregation is performed. The expression argument is the expression which will be evaluated for each row of the table. When there are no rows in the table, AVERAGEX will return a blank value, while when there are rows but non meet the specified criteria, the function returns a value of 0.

Time to see it in action with an example. We are interested in finding the average sales made by each employee. We can create the following measure to display this information.

Employee Average Total Sales = 
AVERAGEX(
   Employee, 
   [TotalSales]
)

This measure evaluates our TotalSales measure for each employee. The sales table is filtered by the EmployeeID, the employee’s total sales is calculated, then finally after all the employees totals sales are calculated the expression calculates the average.

In this above example, we can see the difference between AVERAGE and AVERAGEX. When we use the AVERAGE function this calculates the average of all the individual sale values for each employee, which is $3,855. The Employee Average Total Sales measure uses AVERAGEX and first calculates the total sales for each employee (Sum of Amount column), and then averages these total sales values returning an average total sales amount of $95,400.

What makes AVERAGEX particularly useful is its ability to handle complex calculations within the averaging process. It helps us understand the average result of a specific calculation for each row in our data. This can reveal patterns and insights that might be missed with basic averaging methods. AVERAGEX, and other iterators, are powerful tools in our DAX toolkit, offering nuanced insights into our data.


COUNTing on Data: The Role of Count Functions in DAX

The COUNT functions in DAX, such as COUNT, COUNTA, and DISTINCTCOUNT, are indispensable when it comes to understanding the frequency and occurrence of data in our dataset. These functions provide various ways to count items, helping us to quantify our data effectively.

COUNT

For our exploration of DAX counting functions, we will start with COUNT. As the name suggests, this function counts the number of non-blank values within the specified column. To count the number of blank values in a column check out the reference document for COUNTBLANK. The syntax for COUNT is shown below, where column is the column that contains the values to be counted.

COUNT(column)

If we want to get a count of how many sales transactions are recorded, we can create a measure with the expression below.

Sale Transaction Count = 
COUNT(Sales[SalesID])

This new measure will provide the total number of sales transactions that have a sales id recorded (i.e. not blank).

The COUNT function counts rows that contain numbers, dates, or strings and when there are no rows to count the function will return a blank. COUNT does not support true/false data type columns, if this is required, we should use COUNTA instead.

When our goal is to count the rows in a table, it is typically better and clearer to use COUNTROWS. Keep reading to explore and learn more about COUNTA and COUNTROWS.

COUNTA

COUNTA expands on COUNT by counting all non-blank values in a column regardless of datatype. This DAX expression follows the same syntax as COUNT shown above.

In our Employee tables there is a true/false value indicating if the employee is a current or active employee. We need to get a count of this column, and if we use COUNT we will see the following error when we try to visual the Employee Active Column Count measure.

Employee Active Column Count = 
COUNT(Employee[Active])

Since the Active column contains true/false values (i.e. boolean data type) we must use COUNTA to get a count of non-blank values in this column.

Employee Active Column Count = 
COUNTA(Employee[Active])

Building on this measure we can use COUNTAX to get a current count of our active employees. We will create a new measure shown here.

Active Employee Count = 
COUNTAX(
   FILTER(
      Employee, 
      Employee[Active]=TRUE()
   ), 
   Employee[Active]
)

Here we use COUNTAX, and for the table argument we use the FILTER function to filter the Employee table to only include employees whose Active status is true.

COUNTROWS

Next, we will look at COUNTROWS, which counts the number of rows in a table or table expression. The syntax is:

COUNTROWS([table])

Here, table is the table that contains the rows to be counted or an expression that returns a table. This argument is optional, and when it is not provided the default value is the home table of the current expression.

It is typically best to use COUNT when we are specifically interested in the count of values in the specified column, when it is our intention to count the rows of a table, we can use COUNTROWS. This function is more efficient and indicates the intention of the measure in a clearer manner.

A common use of COUNTROWS is to count the number of rows that result from filtering a table or applying context to a table. Let’s use this to improve our Active Employee Count measure.

Active Employee CountRows = 
COUNTROWS(
   FILTER(
      Employee, 
      Employee[Active]=TRUE()
   )
)

In this example it is recommended to use COUNTROWS because we are not specifically interested in the count of values in the Active column. Rather, we are interested in the number of rows in the Employee table when we filter the table to only include Active=true employees.

DISTINCTCOUNT

Adding to these, DISTINCTCOUNT is particularly useful for identifying the number of unique values in a column, with the following syntax.

DISTINCTCOUNT(column)

In our report we would like to examine the number of unique products sold within our dataset. To do this we create a new measure.

Unique Products Sold = 
DISTINCTCOUNT(Sales[ProductID])

We can then use this to visual the number of unique Product Ids within our Sales table, and we can use this new measure to further examine the unique products sold broken down by year and quarter.

Together, DAX count functions provide a comprehensive toolkit for measuring and understanding the dimensions of our data in various ways.


MAXimum Impact: Extracting Peak Value with MAX and MAXX

In DAX, the MAX and MAXX functions are the tools to use for pinpointing peak performances, maximum sales, or any other type of highest value within in our dataset.

MAX

The MAX function is simple to use. It finds the highest numeric value in a specified column.

MAX(column)

The column argument is the column in which we want to find the largest value. The MAX function can also be used to return the largest value between to scalar expressions.

MAX(expression1, expression2)

Each expression argument is a DAX expression which returns a single value. When we are using MAX to compare two expressions, a blank value is treated as 0, and if both expressions return a blank value, MAX will also return a blank value. Similar to COUNT, true/false data types are not supported, and if we need to evaluate a column of true/false values we should use MAXA.

Let’s use MAX to find our highest sale amount.

Max Sale Amount = 
MAX(Sales[Amount])

This new measures scans through the Amount column in our Sales table and returns the maximum value.

MAXX

MAXX builds on the functionality of MAX and offers more flexibility. It calculates the maximum value of an expression evaluated for each row in a table. The syntax follows the similar pattern as the other aggregation iterators.

MAXX(table, expression, [variant])

The table and expression arguments are the table containing the rows for which the expression will be evaluated, and the expression specifies what will be evaluated. The optional argument variant can be used when the expression has a variant or mixed value type, by default MAXX will only consider numbers. If variant is set to true, the highest value is based on ordering the column in descending order.

Let’s add some more insight to our Max Sale Amount measure. We will use MAXX to find the highest sales amount per product across all sales regions.

Max Product Total Sales = 
MAXX(
   Products, 
   [TotalSales]
)

This measure iterates over each product and calculates the totals sales amount for that product by evaluating our previously created TotalSales measure. After the total sales for each product is calculated the measure returns the highest total found across all products.

These functions provide us the tools to explore the maximum value within specific columns and also across different segments and criteria, enabling a more detailed and insightful understanding of our data’s maximum values.


MINing for Gold: Uncovering Minimum Values with DAX

The MIN and MINX functions help us discover the minimums in various scenarios, whether we are looking for the smallest sale or quantity, or any other type of lowest value.

MIN

MIN is straightforward, it finds the smallest numeric value in a column or, similar to MAX, the smallest value between two scalar expressions.

MIN(column)
MIN(expression1, expression2)

When comparing expressions, a blank value is handled the same as how the MAX function handles a blank value.

We have already identified the highest sale value, let’s use MIN to find our lowest sale amount.

Min Sale Amount = 
MIN(Sales[Amount])

This measure checks all the values in the Amount column of the Sales table and returns the smallest value.

MINX

MINX, on the other hand, offers more complex analysis capabilities. It calculates the minimum value of an expression evaluated for each row in a table. Its syntax will look familiar and follows the same pattern as MAXX.

MINX(table, expression, [variant])

The arguments to MINX are the same as MAXX, see the previous section for details on each argument.

We used MAXX to find the maximum total product sales, in a similar manner let’s use MINX to find the lowest total sales by region.

Min Region Total Sales = 
MINX(
   Regions, 
   [TotalSales]
)

The Min Region Total Sales measure iterates over each region and calculates its total sales, then it identifies and returns the lowest totals sales value.

These functions are powerful and prove to be helpful in our data analysis. They allow us to find minimum values and explore these values across various segments and conditions. This helps us better understand the lower-end spectrum of our data.


Blending Aggregates and Filters: The Power Duo

Blending aggregation functions with filters in DAX allows for more targeted and nuanced data analysis. The combination of functions like CALCULATE and FILTER can provide a deeper understanding of specific subsets in our data.

CALCULATE is a transformative function in DAX that modifies the filter context of a calculation, making it possible to perform aggregated calculations over a filtered subset of data. CALCULATE is crucial to understand and proves to be helpful in many data analysis scenarios. For details on this function and plenty of examples blending aggregations functions with CALCULATE take a look at this in-depth post focused solely on this essential function.

Demystifying CALCULATE: An exploration of advanced data manipulation. 

FILTER is another critical function that allows us to filter a table based on a given conditions. We used this function along with COUNTROWS to count the number of active employees. For additional examples and more details on FILTER and other filter functions see the post below.

Discover how to effortlessly navigate through intricate data landscapes using DAX Filter Functions in Power BI.


Working with DAX in Power BI can be incredibly powerful, but it is not without its pitfalls. Being aware of common mistakes and understanding how to avoid them can save us time and help ensure our data analysis is as accurate and effective as possible.

One frequent mistake is misunderstanding context in DAX calculations. Remember, DAX functions operate within a specific context, which could be row context or filter context. Misinterpreting or not accounting for this can lead to incorrect results. For instance, using an aggregate function without proper consideration of the filter context can yield misleading totals or averages.

Another common issue is overlooking the differences between similar functions. For example, SUM and SUMX might seem interchangeable, but they operate quite differently. SUM aggregates values in a column, while SUMX performs row-by-row calculations before aggregating. Understanding these subtleties is crucial for accurate data analysis.

Lastly, we should always beware of performance issues with our reports. As our datasets grow, complex DAX expression can slow down our reports. We should look to optimize our DAX expressions by using appropriate functions and minimizing the use of iterative functions (like aggregations functions ending in X) when a simpler aggregation function would suffice.


Mastering Aggregation for Impactful Analysis

As we reach the conclusion of our exploration into DAX aggregation functions, it’s clear that mastering these tools is essential for impactful data analysis in Power BI. Aggregation functions can be the key to unlocking meaningful insights and making informed decisions.

Remember, the journey from raw data to actionable insights involves understanding not just the functions themselves, but also the context in which they are used. From the basic SUM to the more complex SUMX, each function has its place and purpose. The versatility of AVERAGEX and the precision of COUNT functions demonstrate the depth and flexibility of DAX.

Incorporating MAX and MIN functions helps us identify extremes in our datasets. Blending aggregations with the power of CALCULATE and FILTER shows the potential of context-driven analysis, enabling targeted investigations within our data.

The journey through DAX aggregation functions is one of continuous learning and application. As we become more comfortable with these tools, we will find ourselves able to handle increasingly complex data scenarios, making our insights all the more powerful and our decisions more data driven. Continue exploring DAX aggregation functions with the DAX Reference.

Learn more about: Aggregation Functions


Thank you for reading! Stay curious, and until next time, happy learning.

And, remember, as Albert Einstein once said, “Anyone who has never made a mistake has never tried anything new.” So, don’t be afraid of making mistakes, practice makes perfect. Continuously experiment and explore new DAX functions, and challenge yourself with real-world data scenarios.

If this sparked your curiosity, keep that spark alive and check back frequently. Better yet, be sure not to miss a post by subscribing! With each new post comes an opportunity to learn something new.

Power Apps Dynamic Design: Explore Dynamic UI Strategies


Setting the Stage for Dynamic Interfaces

If you are new to the world of Power Apps, it is where we blend our creativity with technology to build some seriously powerful and helpful applications. In this particular exploration we will be diving into an inventory management application for Dusty Bottle Brewery.

Our focus? Dynamic user interfaces (UI). It is all about making an app that is not only functional but also engaging and intuitive. Imagine an inventory app that adapts in real-time, showcasing inventory updates, new arrivals, and even alerts when a popular brew or item is running low. That is the power of dynamic UI in action, it makes our app come alive.

Join me as we explore Power Apps and learn how to transform a standard inventory management application into an interactive and responsive tool. We will dive into leveraging visible properties, integrating role-based elements, and much more. Whether you are an expert or just starting, come along on this exciting journey to create a dynamic and vibrant app.


The Magic of Visible: More Than Meets the Eye

The Visible property in Power Apps is crucial for creating a dynamic app at Dusty Bottle Brewery and forms the cornerstone of creating an engaging user experience. Using this property effectively is focused on displaying the right information at the right time for a sleek yet informative interface.

Here’s how it works in action: when we open our Inventory App, we are brought to a dashboard showing current stock levels. This main dashboard uses the visible property of various elements to dynamically show additional information for each item.

For example, each item shows a stock status badge indicating if the stock level is good, average, low, or extremely low. This is all made possible leveraging the visible property of these objects. It’s more than just hiding and showing object, we are creating a responsive experience that adapts to user interactions.

Let’s dive into the information (i) icon and the details it has to offer. By selecting the i icon for a product, we reveal additional information like the recommended order amount, cost per unit, and total cost for the recommended order.

Time to see how it works with some practical expressions. Below is the main dashboard. Notice how the information (i) icon appears on the selected item. This is accomplished by setting the visible property of the icon to ThisItem.IsSelected.

Additionally, by selecting this icon the user can display additional information. This information provides just in time insights. Providing for a responsive experience that displays all the required information at just the right time leaving a clean and simple dashboard with hidden power that is revealed through user interactions.

We use a variable to set the Visible property of the informational items. For the informational icons OnSelect property we use:

UpdateContext({locInfoVisible:!locInfoVisible});

The locInfoVisible variable toggles between true and false, acting as a switch. The pattern of using ! (i.e. not) and a boolean variable is helpful for flipping the variable’s value between true and false.

We are not limited to boolean variables to control our app objects visibility. Any expression that evaluates to true or false will work. An example of this within our app is the stock status badges. Each icon has its own specific condition controlling its visibility.

For each product we calculate the percentage of our target stock count. In the app we store this value in the text label lbl_Main_StockEval.

For example, the Extremely Low icon’s visible property is set to

Value(lbl_Main_StockEval.Text)<=20

This results in the icon showing only when the expression evaluates to true, that is if the item stock is less than or equal to 20% of the target amount.

Effectively pairing expressions with the visible property streamlines our app’s interface, focusing attention on what is most relevant. This elevates our apps from functional to intuitive and powerful.


User Roles and UI Elements: A Match Made in Heaven

Customizing apps based on user roles is crucial for any organization. Although this type of customizing includes things such as access control, it can go way beyond just that. Customizing our apps for different user roles is focused on making our apps more intuitive and user-friendly while recognizing what that means may differ for each individual or for each user role.

Let’s, examine a scenario with our Dusty Bottle Brewery inventory app where personnel should see a simplified dashboard focused on just their area of responsibility. Staff in the Brewing department should only see brewery related inventory, staff in the Sales and Marketing should only see merchandise related inventory, while staff in Logistics and Supply Chain should be able to view all items. This is where the flexibility of Power Apps shines, allowing us to tailor our apps based on the current user.

We first need to add the Office 365 Users data connector which then allows us to set UserProfile to the current user’s profile. In the Formulas property of the App object we add the following Named Formula:

UserProfile = Office365Users.MyProfileV2();

Note: This can also be done with a global variable by adding the following to the OnStart property of the App object.

Set(gblUserProfile, Office365Users.MyProfileV2());

The user profile provides the required information to personalize the user experience for our app. For example, we use UserProfile to welcome the current user in the top right of the app.

Next, we use the user’s department to control the data presented on the dashboard, ensuring relevant information is highlighted.

To add this role-based feature we add the following to the App OnStart property to pre-load the appropriate data.

Switch(
    true,
    UserProfile.department = "Brewing",
    ClearCollect(
        colSpInventory,
        Filter(
            Inventory,
            Category.Value = "Beer"
        )
    ),
    UserProfile.department = "Sales and Marketing",
    ClearCollect(
        colSpInventory,
        Filter(
            Inventory,
            Category.Value = "Merchandise"
        )
    ),
    UserProfile.department = "Logistics and Supply Chain",
    ClearCollect(
        colSpInventory,
        Inventory
    )
);

Here we filter the collection of inventory items (colSpInventory) based on the user’s department. This collection is then used in the Items property of the gallery displaying the inventory items. This approach enhances the efficiency and reducing clutter within our app.

For instance, Dusty Bottle’s Lead Brewer, Adele Vance, sees only brewery items, streamlining her experience. This helps Adele identify brewery items that are low in stock and provides all the information she requires without cluttering the dashboard with irrelevant information.

What is the most exciting about this level of control is the possibilities of the personalization aspect.

For example, let’s build on this role-based feature by expanding it beyond the user’s department. Dusty Bottle Brewery has a management team containing members of all departments and the members of this group should be able to see all inventory items. This group of users is defined by a Microsoft 365 group, and we will leverage the group’s membership to add this functionality to our app.

First, we add the Office 365 Group data connector to our app. Similar to Office 365 Users, this allows us to use Office365Group.ListGroupMembers to get all the members of our Management group.

Then we add another Named Formula to the Formulas property of the App.

ManagementMember = !IsBlank(
    LookUp(
        Office365Groups.ListGroupMembers("<group_object_id").value,
        displayName = UserProfile.displayName
    )
);

Let’s break this down, starting from the inside working out. We provide Office365Groups.ListGroupMembers the object id of the required group, this then provides a record. The record property value contains the membership user information we are looking for. We then use LookUp to see if the current user’s display name is within the group members. If the returned record from LookUp is not (!) blank, then the user is a member of the management group, and ManagementMember returns a value of true, otherwise false.

Finally, we update the OnStart property of our app to the following.

Switch(
    true,
    UserProfile.department = "Brewing",
    ClearCollect(
        colSpInventory,
        Filter(
            Inventory,
            Category.Value = "Beer"
        )
    ),
    UserProfile.department = "Sales and Marketing",
    ClearCollect(
        colSpInventory,
        Filter(
            Inventory,
            Category.Value = "Merchandise"
        )
    ),
    ManagementMember || UserProfile.department = "Logistics and Supply Chain",
    ClearCollect(
        colSpInventory,
        Inventory
    )
);

Providing each user or group a tailored interface that feels like it is made just for them. Using these role-based approaches we can deliver the right tools and information to the right people at the right time.


Input-Driven Interfaces: Reacting in Real-Time

In the dynamic environment of any organization, an input-driven interface can significantly improve the user experience by responding to user actions in real-time. This approach makes the app both intuitive and interactive.

For example, updating inventory involves selecting an item from the main dashboard to access its restocking screen. On the restocking screen the user is provided all the essential information for restocking an item.

This screen shows the cost, stock status indicator, stock count, and the target stock count on the left. On the right, is a dynamic input control and what the stock indicator would be if the input quantity is restocked. The default of this control is the difference between the current stock and the target stock value.

The input-driven interface updates information based on user input, ensuring accuracy and responsiveness. For instance, changing the restock quantity automatically updates the related information (e.g. Restock Total Cost).

What if the user is only able to restock 10 of these baseball caps. After updating the Restock Quantity input, we see the change reflected in the Restock Total Cost.

We achieve this by referencing the restock quantity (txt_Restock_QuantityAdded) in the text label displaying the total cost and the visible property fields of the stock indicator badges. The total cost label’s text property is set to the following.

Text(
    Value(txt_Restock_QuantyAdded.Text * gblSelectedItem.Cost),
    "$#,##0.00"
)

But the possibilities don’t have to end there. The app could integrate sliders or dropdown menus for inventory updates. As the user adjusts these controls, the interface could dynamically show the impact of these changes.

This approach can be extended to handle complex scenarios, like entering a new item, where the app reveals additional fields based on the item category or other properties. This can help keep the interface clean while also guiding the user through data entry in a logical, step-by-step manner.

Harnessing the power of input-driven interfaces transforms our apps into responsive companions, adapting to user needs and simplifying tasks.


Buttons and Actions: Bringing Our Interfaces to Life

Interactive buttons and actions play a pivotal role in bringing the user interface to life. They create engaging and interactive experiences for our users.

Consider our simple action of updating stock levels in our inventory app. Selecting the Restock button updates the stock value and, if successful, presents a success message to the user. This immediate feedback reassures users and enhances their interaction with the app.

Additionally, we can tailor buttons and actions for different user roles. For example, enabling the Restock button only for management staff. Using the ManagementMember named formula created previously, we set the DisplayMode of the Restock button to the following.

If(ManagementMember, DisplayMode.Edit, DisplayMode.Disabled)

By thoughtfully integrating these elements, we turn mundane tasks into engaging interactions, making our apps an integral part of the daily workflow.


Tying It All Together: Crafting a Seamless Navigation Menu

As our apps grow in complexity and expand, easy navigation becomes crucial. A well-crafted navigation menu integrates all the dynamic UI features we have discussed into one cohesive, user-friendly package.

First, the navigation menu’s visibility is a key aspect and is controlled by the Visible property. We can make the navigation menu appear and disappear with a simple button click. This approach keeps the interface clean and uncluttered, allowing users to access the menu when needed and hide it when focusing on other tasks. We us a hamburger menu icon to launch the menu when selected using the following for its OnSelect property.

UpdateContext({locNavigationVisible: true})

Additionally, we will set the Visible property of the hamburger icon to !locNavigationVisible. This will hide the icon after it is selected allowing us to show a cancel icon that when selected will hide the navigation menu. The Cancel icon’s OnSelect property is set to the following.

UpdateContext({locNavigationVisible: false})

While its Visible property is set to locNavigationVisible.

Next, we enrich the navigation with selectable icons and actions that allow users to effortlessly navigate between the different screens of our app. Each icon in the navigation menu is linked to a different screen in the app. Using the Power Apps Navigate function and the OnSelect property of the icons seamlessly transports the users to the desired screen, enhancing the app’s overall usability and flow.

Lastly, we tailor the navigation experience to different user roles. For instance, links to admin-specific screens. Above, we can see the navigation menu includes a button to navigate to the Admin screen. This screen should only be accessible to staff within the Logistics and Supply Chain department. To do this we add the following named formula to our App’s Formulas property.

AdminUser = UserProfile.department = "Logistics and Supply Chain"

We can then set the Visible property of the Admin button within the navigation menu to AdminUser. This will make this navigation button visible if the current user is within the Logistics and Supply Chain department and hide this option for all other staff.

Now, we can see that the Admin navigation icon is visible to Grady, who is within the Logistics and Supply Chain department.

However, when Adele uses this app, who is not in this department, the navigation icon is not shown.

By integrating these elements, the Inventory Management app’s navigation becomes a central hub that intelligently adapts to user needs and roles.


Wrapping Up: The Future of Dynamic UI in Power Apps

As we wrap up our journey through Dusty Bottle Brewer’s Inventory App, it is clear that the future of dynamic UI in Power Apps is here and now. Harnessing the power of features like the Visible property, role-based UI elements, input-driven interfaces, and more, we have seen how an app can transform from a simple tool into an essential part of the organizational ecosystem.

The power of Power Apps lies in its ability to continuously evolve allowing us to iterate on our apps, enhancing their responsiveness and efficiency. This inventory app showcases how technology meets business needs and enhances user experiences.

As we build upon our apps the possibilities are varied and exciting. We can incorporate more advanced integrations, AI-driven functionalities, and even more user-friendly designs. The goal will always remain the same: to create applications that are not just functional, but intuitive, responsive, and easy to use.

Here’s to the future of dynamic UI in Power Apps – a future where technology meets user needs in the most seamless and engaging ways possible. Cheers to that!


Thank you for reading! Stay curious, and until next time, happy learning.

And, remember, as Albert Einstein once said, “Anyone who has never made a mistake has never tried anything new.” So, don’t be afraid of making mistakes, practice makes perfect. Continuously experiment, explore, and challenge yourself with real-world scenarios.

If this sparked your curiosity, keep that spark alive and check back frequently. Better yet, be sure not to miss a post by subscribing! With each new post comes an opportunity to learn something new.